Types of Woodworking Joints
As a woodworker, you will be working with joints all the time – especially so if you are working on tables, cabinets, cupboards, and other similar projects.
Majority of these joints where designed years ago to give the cabinetry and furniture it’s strength and durability.
A lot of the mass produced furniture these days have gone away from this type of design to reduce costs and for speed of manufacturing, but this has compromised the quality, strength and durability.
There is nothing better than having a well designed and constructed piece of furniture in the house. I bet you have at least one piece of furniture like this that has been with you for years and survived many moves – I know I have.
Today, I will introduce you to the different types of woodworking joints—from the simplest one like a butt joint to complicated ones like the dovetail. By the end of this tutorial, you should have a clear grasp about different joint types, and how you can use them to make sturdy woodworking projects.
Imagine building that one piece of furniture that you have for ever.
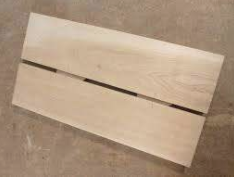
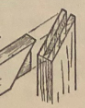
Widening Joints
Widening joints are commonly used in applications like widening of bench tops, sides and tops of cabinetry, chopping boards, flooring (floorboards and plywood sheet flooring), to name a few.
This is generally done by joining two pieces of timber edge to edge.

Widening Joints
Butt Joint
A butt joint is the simplest wood joinery. Here, you simply put together the two ends of the wood. Both must have flat surfaces. To put them together, you either use glue or nail them. You can also use screws to put them together. When gluing the technique used is called “Rubbed Glue Joint” where the ends are rubbed together creating a slight suction, removing any air bubbles between the two pieces.
The butt joint is the easiest type of joint to put together, but it is the weakest. It only relies on the strength of the glue or the nail. You can reinforce your butt joint with screws, nails, and dowels. Butt joints are the most common form of join in DIY cabinets that you can buy from stores like IKEA.
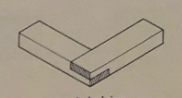
Butt joints can also be used for angle joints – these can be a simple butt joint, shouldered butt joint and mitred butt joint.
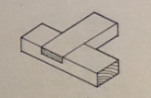
Shouldered Butt Joint
Biscuit Joint
This is a type of joint where you use a special-cut wood called a “biscuit”. You typically use it to join two planks of wood.
It is called so because it is like a biscuit—it is flat and round. Some are oval. To be able to use this kind of joint, you need a biscuit joiner machine that will cut through the two pieces of wood that you are putting together.
This cut is the exact same size of the biscuit. To put the two wood pieces, you apply glue on the biscuit, and then slide this biscuit inside the biscuit hole in the wood. Both half-sides of the round biscuit will enter the two different wood pieces, and it is this biscuit that will bind or hold them together. Using the rubbing technique will again give it the adhesion required and remove the air bubbles with the use of light clamping to hold in place for when the glue dries.
Having the biscuits being oval allow you to move the boards slightly along it’s length to get you to your desired position.
Biscuit Joint
Tongue and Groove Joint
This joint is when one edge is grooved and other edge has a tongue. The two edges are put together to create the joint. The joint is made stronger by glue.
You typically use tongue and groove joints if you are joining two pieces of the same length and if you need to join them on the side, not the face. It works best if you are trying to build a board from wood planks, like boards for tabletops.
This is also the most common joint for wood flooring.
An alternate to this is when both edges have the groove rebated out and piece of timber is inserted as a tongue (joining piece) to give it’s strength. This is how particle board flooring is constructed, but the tongue is a plastic strip, and is colour coded to differentiate between the particle boards application.
Dowel Joints
The dowel joint is a kind of joint where you drill a hole in both woods. Then, you use a dowel—a long cylindrical piece of wood—to join them together. The dowel gives it the added strength required. Most of the time, you use glue with the dowel.
Dowel joints are mostly used in joining wooden parts of a cabinet. It is most commonly used to join two thick pieces, like posts. This joinery is not used for heavy-duty projects like actual posts and beams, but rather posts of small furniture, like a nightstand.
You need to buy the dowels from a wood store, and then use your drill to create the hole on the pieces you are working on.
There are good jigs available to help with the accuracy when drilling the holes.
Rebate Joint
This joint is where half the thickness is removed to an equal depth from the edges of tow pieces of timber and joined together along it’s length. This rebate gives the joint it’s strength.
This can be also used as an angle joint, keeping in mind that the the depth of the rebate should be the same as the thickness of the timber otherwise the finish will not be flush. Being a little deeper would not matter as you can easterly plane the edge.
The easiest way to create the rebate is with a router.
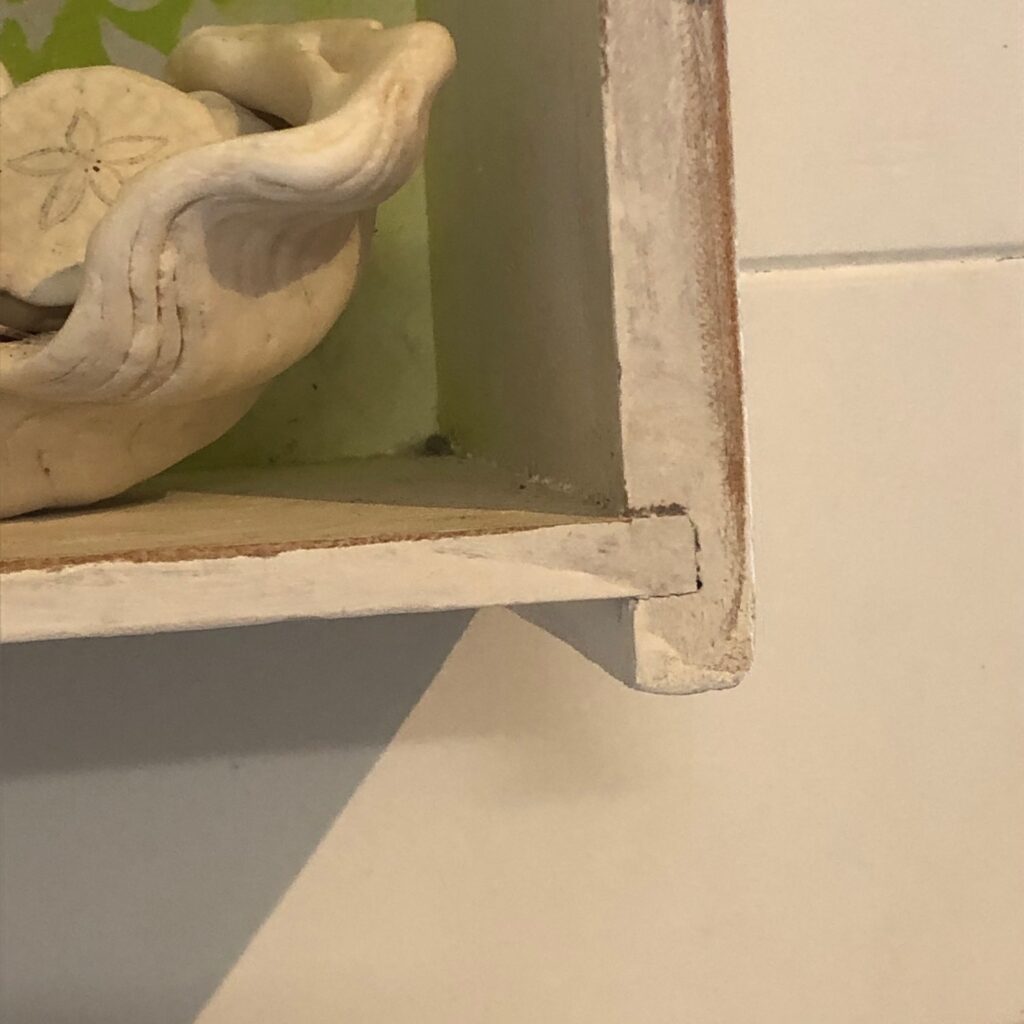
Rebate Joint
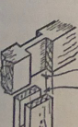
Pocket Hole joint
A pocket hole joint can be used as a widening joint and an angled joint.
A pocket hole is a type of joint that involves screws. This is also a butt joint but only made stronger because the screw is driven on a diagonal angle.
You use a pocket hole if you want to put together two pieces of wood at a right angle. While you can glue the two pieces or screw them together from a straight angle, this kind of joinery is weak. The pocket hole allows you to screw from the face instead of the end grain, and this makes the joinery stronger.
You can make pocket holes even if you do not have special tools. But if you want a clean and perfect hole, you need to use pocket hole jigs.
You will need to take care so you don’t blow out the sides or the end grain.
Angle Joints
Angled Joints are generally used for joining together pieces of timber at right angles.
They are used in the construction of box like shapes – drawers, cabinets, boxes and shelving.
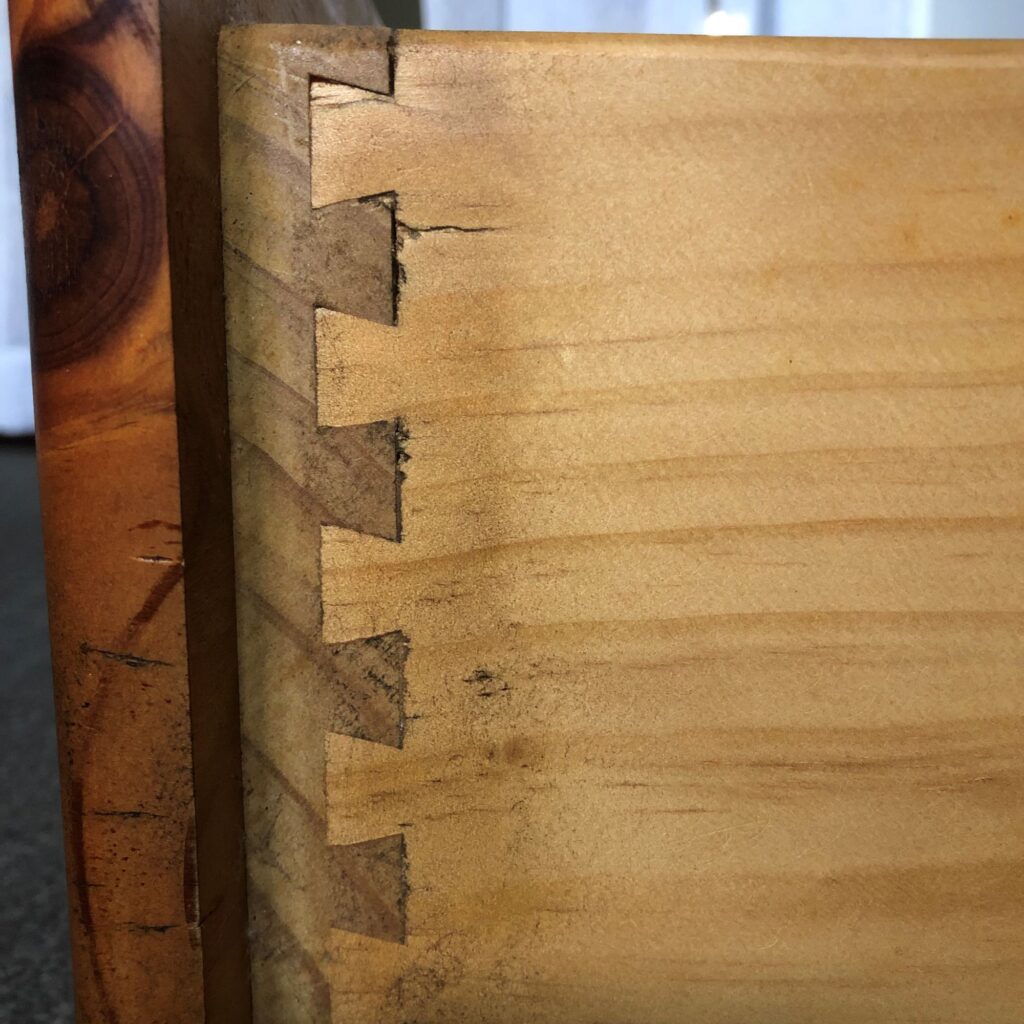
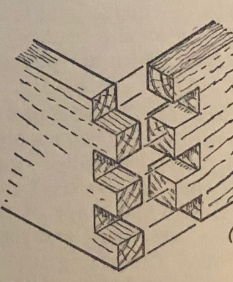
Dovetail Joint
One of the most difficult to make is the dovetail joint, but it is one of the strongest. Usually, this joint is used to make cabinets. It will take a tremendous amount of force to break it apart. It is called a dovetail because you have to cut a series of slots on one wood, and then a series of pins on the other, which looks like the tail of a bird.
These pins should fit perfectly on the slots on the other wood, and this exact fit is what gives the joint a superb tensile strength. You can use glue to further strengthen the bond, but this is not necessary in most cases.
These can be done as a single dovetail, common or through dovetail, lapped dovetail and secret dovetail. The most commonly used and seen dovetail joint………you guest it, the common or through dovetail joint.
Stopped Dovetail Joint
Box Pin Joint
The Box Pin Joint is similar to the dovetail joint, but the pins and the pins sockets are square.
The box joint is an all-encompassing type of joint that includes two plans. It is called a box pin joint because you usually use it to put two perpendicular pieces to form a 90-degree angle. This type of joint is best used for the sides of a drawer as an alternative to the dovetail joint.
The box joint has an interlocking kind of joint, much like you interlock your fingers together. It is one of the most difficult joints to make, but it is one of the sturdiest—more so if you apply a strong glue.
Box Pin Joint
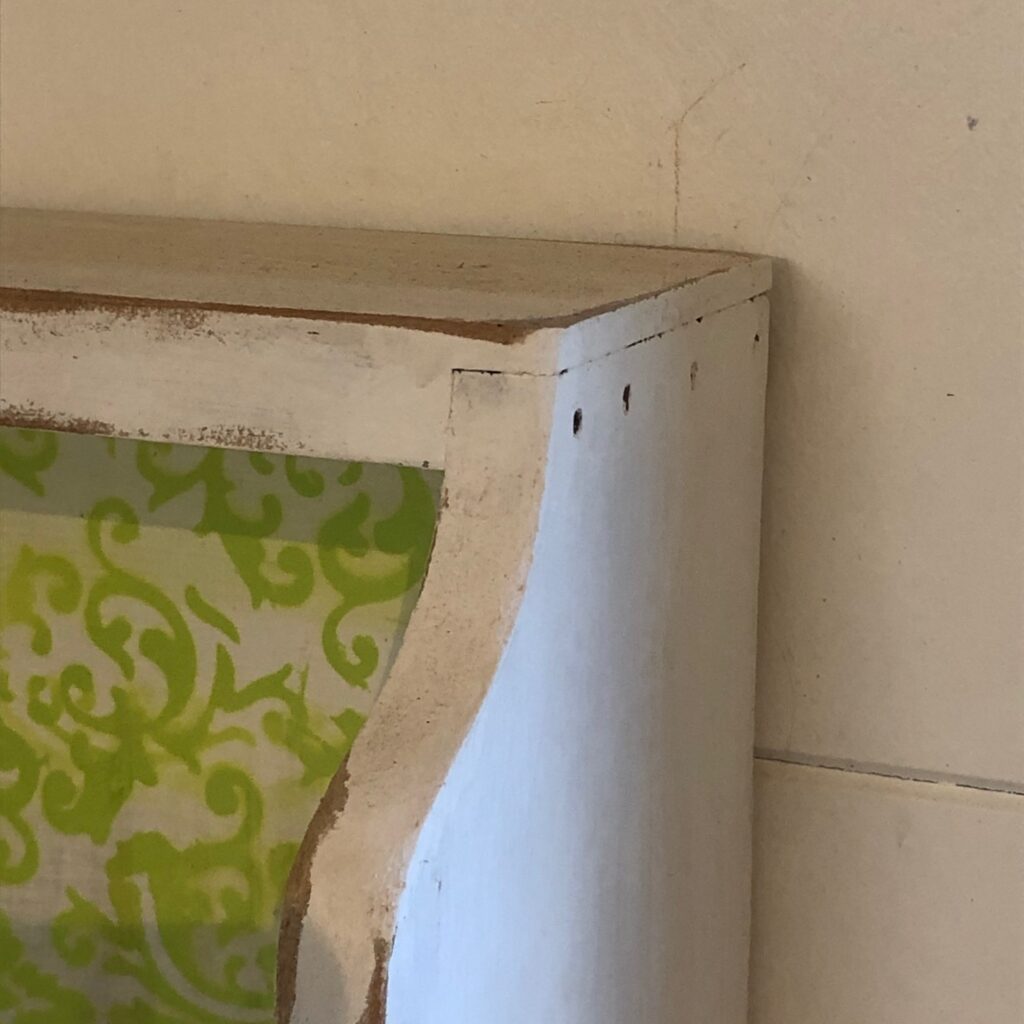
Housing joint
This is where the end or edge of one piece is rebated into the face of another piece of timber by way of rebating or trenching.
The rebate or trench can be completed where the trench extends the full width of the timber (Through Housed Joint) or it can stop short of the end (face) to conceal the rebate/trench for a better finish (Stopped Housed Joint).
This is commonly used for shelving in cabinets, bookcases and used in treads for stairs.
Housing Joints
Framed Joints
Framing Joints are used in frame-like construction. The pieces of timber are generally joined at their ends or along their edges at a 90deg angle.
These can be used in the construction of – picture frames, panel doors, tables and chairs.
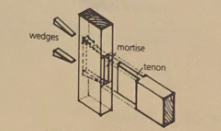
Mortise and Tenon joint
This is another powerful type of joinery but can be a complicated one to make, super rewarding when you do. This joint is the most common and strongest form of the framing joints.
With mortise and tenon, the two pieces of timber are assigned as male and female. The receiving end has a slot whose size is equal to the tongue of the “male” wood.
A mortise and tenon joint is like a socket and a plug. The mortise is the hole, and the tenon is the tongue. Because the tongue fits snuggly in the mortise and with the use of wedges, it will not move.
This type of joint is best for joining perpendicular woods—like beams.
There are different type of Mortise and Tenon joints – Common or Through M&T, Simple Corner M&T (without haunch), Haunched M&T
The M&T joints are commonly used to join frame carcasses for cabinetry and for joining rails to legs when constructing tables and chairs.
Mortise and Tenon Joint
Mitre Joint
The mitre joint is a type of butt joint, generally the pieces of timber are mitred across their width. The mitre cut is something you usually see in picture frames, but it is also common in furniture joinery.
In a mitre joint, you cut the end of the wood at a 45-degree angle. Once you put them together, they form a 90-degree angle (true mitre). You can also use different sized angles when creating more or less than 4 sides.
The way you strengthen a simple mitre is through glue and can be secured by screwing or nailing the joint. Many woodworkers also join a mitre with biscuit joints or dowelling to make it stronger.
Mitre Joint
Halving and Half-lap Joint
A half-lap joint is a lap joint. It is where the pieces of timber meat each other, are halved in their thickness so when they are put together the face of both pieces of timber are flush with each other.
The half-lap joint is used mostly to build a square frame, and only if you need to join wood to produce a 90-degree angle. The half-lap joint is not as strong as the other joints, but you can reinforce it with glue, screw, or nail.
There are different types of Half-lap Joints – Corner Halving Joints, Mitred Corner Joints, Tee Halving Joints, Dovetail Tee Halving Joints and Cross Halving Joints.
Tee Halving Joint
Corner Halving Joint
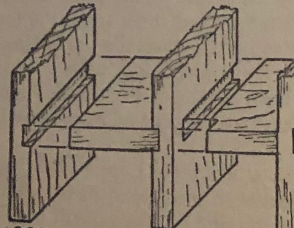
Bridle Joints
These joints are sometimes used in place of mortise and tenon joints. Where a stronger joint than a halving joint is required and less than a common mortise and tenon joint, a bridle joint is a great middle ground joint that will give you the required strength without the additional work.
The bridle joint differs from the mortise and tenon joint as the mortise or trench that receives the tenon is an open mortise cut into the end of the piece of timber. The tenon can be cut , as with the mortise and tenon joint, in the middle or end of the other piece of timber. This can be a through , stopped or mitred bridle joint.
These are also used where rails meat legs in chair and table construction and in cabinetry carcass construction.
To strengthen the joint so it does not pull apart, it can be secured with screws, nail or with a piece of dowel that is inserted through a hole that goes through both pieces of timber so the joint can’t pull apart.
Common Bridle Joint
Mitred Bridle Joint
Summary
There goes our list of the types of woodworking joints. Some joints are difficult to create, and some require special tools. Start with the simple ones and master them. Slowly move your way up. It is alright if you do not make the joints right the first time. Woodworking is a craft that takes time to perfect—be patient, and you will get it right soon.
These joints will provide your project with strength, durability and will last forever.
P.S – If your looking at some more joints or getting a different perspective on some the joints I listed above then head to 13 Wood Joinery Types where Ted from Ted’s Woodworking runs through 13 joints, some of which I have listed above, but with his spin on how it is done.
Happy Woodworking
Regards
Ben
(DISCLAIMER – “Some of the links on this web site are affiliate links. Keep in mind that we may receive compensation for recommendations made about the products and/or services. This compensation comes at NO extra cost to you and may be in the form of money, services and/or complimentary products and could exist without any action from a website visitor.”


